Getting Started In Go
July 18, 2019
This is the first post on my blog, which is super exciting (and also means it will probably suck).
In this post, I’ll be trying to get started with Go, and by the end, will hopefully create a simple application that returns ‘Hello World’ at an endpoint.
Installing Go
Installing Go was super simple by just following the instructions on this link. You can find instructions for Linux, macOS, and Windows.
On my macbook pro, it was super easy; I just used the package installer for macOS on this download page.
Test your installation by running the command go version in a terminal. The response should be similar to go version go1.12.7 darwin/amd64. Make sure that the terminal session you’re using was created AFTER you installed Go.
Writing Go Code
Let’s get started coding!
Workspace
Before we create our workspace (where we’ll keep our Go code), let’s talk about what the Go workspace directory is. When I first started reading into how Go’s workspace directory was, I was really confused. Why am I limited to one workspace for my Go installation? Why would I need to change it constantly as I’m switching between repositories/code bases? The workspace isn’t actually where your code needs to live, but it is where Go stores imports (for example, if I import a Go package from Github) and items from Go’s standard library. I think of it as /node_modules/, except instead of being in my project directory, it’s located in a standard location, shared between all of my projects. For example, when I installed a popular package mux (using go get github.com/gorilla/mux), it actually made the following files in my workspace (which is located at $HOME/go):
$HOME
│
└───go
    │
    └───src
    │   │
    │   └───github.com
    │   │   │
    │   │   └───gorilla
    │   │
    │   └───golang.org
    │   ...
    │
    └───bin
    │   ...
    │
    └───pkg
        ...
As you can see above, the sources for the imported package are kept under $HOME/go/src.
Creating Project Directory
Moving away from the workspace, we can make our project directory basically anywhere. So I’ll make a folder named first-go-ex in my Sources folder (but you can make it anywhere, desktop, documents, whatever). In that folder, lets make a go file named server.go (the name doesn’t really matter).
Writing Go Code
Let’s get started writing code.
First, we need to write:
| package main |
In Go, your first line must always declare your page, and the package name must always be “main” for an executable command. We want to execute our file, so we’ll name the package “main”. More information about this line can be found here.
Next, we need to declare our imports, using the below code:
| import ( | |
| "fmt" | |
| "log" | |
| "net/http" | |
| ) |
All of the above imports are from the standard library; therefore, we don’t have to run any go get commands to download them. Their functions are:
fmt: Will allow us to write to the std output.log: Will allow us to log (and write to the std output) when our application fails fatally.net/http: Will allow us to start listening http requests on a port and route those requests to handlers set in our code.
Let’s create the main function of our code, that will be ran when we execute this file. Copy the code below:
| func main() { | |
| http.HandleFunc("/", func(w http.ResponseWriter, r *http.Request) { | |
| fmt.Fprint(w, "Hello World!") | |
| }) | |
| log.Fatal(http.ListenAndServe(":8000", nil)) | |
| } |
There’s a lot to unpack above. Let’s try out best to understand it.
-
func main() {declares our function, similar to the main of an application in Java, it will be the entry point to our code. -
http.HandleFunc("/", func (...))will create a handler to be used whenever a request is sent to path ”/“. When we invoke the HandleFunc function, we pass in an anonymous function that will print “Hello World!” whenever the anonymous function is invoked. -
log.Fatal(http.ListenAndService(":8000", nil))will cause the application to start a web server listening on port 8000 for traffic, and use any handlers that have been created previously. Thehttp.ListenAndServicecall is wrapped in log.Fatal, so that whenever the application must fatally exit, the application will log it.
Whew, that was a lot to get through; hopefully we all made it out in one piece.
Running our Application
If our Go installation was done properly, we should just be able to run our Go application using the command go run server.go in a terminal session scoped to our project directory. If you named the file something else, just use go run <name of go file>.
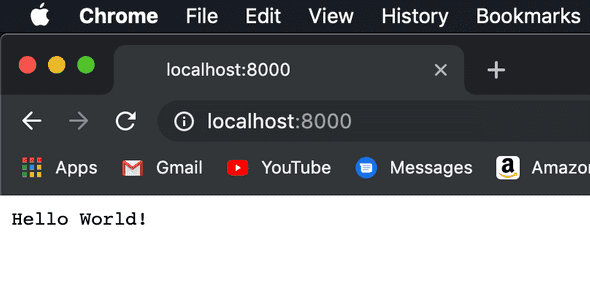
If you’ve followed along properly, you should be able to open up localhost:8000, and see “Hello World!“.
Final Thoughts & Conclusions
Overall, Go was very easy to get started with. The CLI especially is quick to understand, and the functionality needed to run a Go application is very intuitive. The standard library in Go is also intuitive, and very feature rich. To do what the standard library does in Go with Java, I’d probably use quite a bit more code, and probably import an outside library to handle creating the web server, the servlet, mapping the servlet, etc.
Overall, I’m impressed with Go, and am excited to learn more.
Resources
You can find a repository with the source code here.
